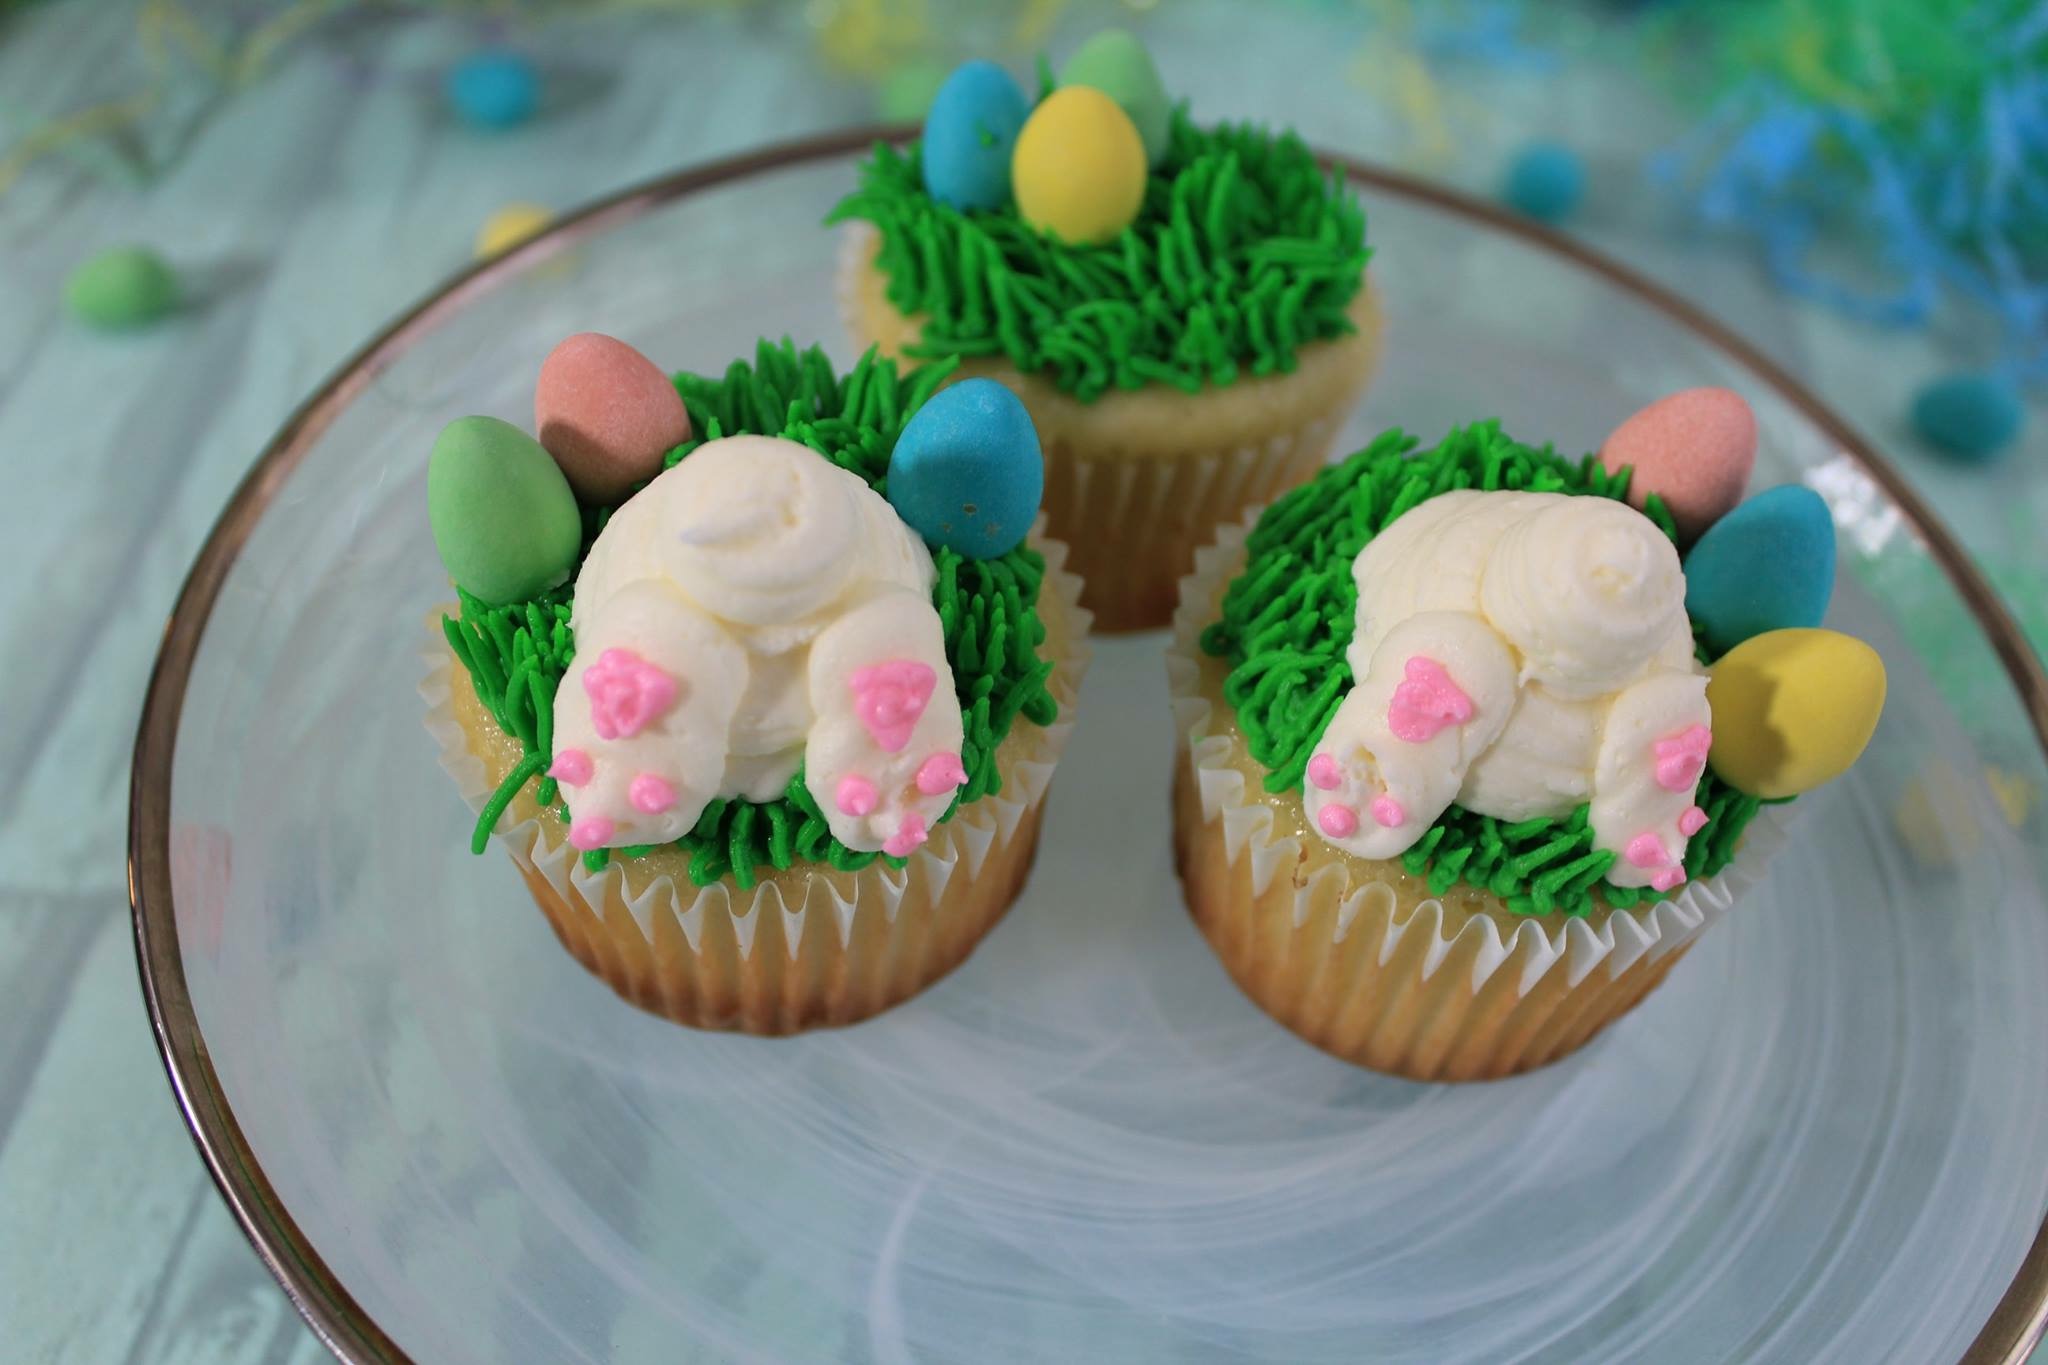
I made these for my family for Easter last year, they were the talk of the evening. Everyone loved them! I call them Easter Bunny Butt Cupcakes. 

These Easter Bunny Cupcakes are so cute, easy to make, and are absolutely delicious. They look like little bunny butts… so let’s get started with my “Go To” buttercream icing recipe. I use it all the time, it’s sturdy and easy to work with. I highly recommend it.
Buttercream Recipe:
1 cup salted butter
1 cup shortening
1/2 cup Whipping cream
4-6 cups icing sugar
1 tsp vanilla
STEP ONE: Whip the whipping cream until fluffy. Set aside.
STEP TWO: Cream the butter until light and fluffy then add shortening. Mix until well combined.
STEP THREE: Slowly stir in whipped whipping cream. Add vanilla and turn mixer on slow.
STEP FOUR: Add one cup of icing sugar to the mixture one at a time. Mix until light and fluffy and your done!
For Cupcake Recipe: This time, I grabbed my favourite cake mix at my local grocery store and followed instructions on the box.
To decorate these Easter Bunny Cupcakes, you will need:
#233 grass tip
#2 tip
#12 tip
#1A
Couplers
Icing bags
Green icing*
Pink icing*
White icing
Cupcakes
Sprinkles or any decorations
*I used Wilton gel food colouring but any gel food colouring will work. I used Pink/rose food colouring & Kelly Green food colouring.
STEP ONE: Piping grass
Using a piping bag of green icing and tip #233, hold bag 90 degrees and gently squeeze bag to release icing. Slowly pull bag up until desired grass length and release. Continue until cupcake is filled with grass.
STEP TWO: Bunny butts
Using a piping bag with white icing and tip #1A, hold bag 45 degrees and squeeze bag (making sure tip is slightly buried in icing so the icing pools) until there is a round blob of icing on the cupcake.
STEP THREE: Bunny tails
Using a piping bag with white icing and tip #12, hold bag 45 degrees and pipe a small circle on top of the bunny butts.
STEP THREE: Feet
Using a piping bag with white icing and tip #12, gently squeeze icing on each side of tail and drag tip in a downward motion.
STEP FOUR: Pink paw prints
Using a piping bag with pink icing and tip #2, pipe a triangle near the top of the feet. Then fill in the triangle with more icing. After you’ve finished, pipe three little dots underneath the triangle to complete the feet.
STEP FIVE: DECORATE! With sprinkles, or chocolates or flowers! I chose chocolate eggs!
This recipe was brought to you by my teenaged baking contributor, Caitlyn from Hobby Cake’s.


